Saturday, June 22, 2013

BYS Caviar & Velvet Nails - Black Mix

Caviar nails have been around for a while now, with Ciate bringing out their range in 2012.  However advanced it was in new nail trends, it was horrendously expensive!  So I decided to bide my time until a cheaper alternative was introduced to the market (which it inevitably almost always is).

On the other hand, flocking, or furry or velvet nails is a relatively new innovation.

Introducing BYS Caviar for Nails and BYS Velvet for Nails

Instead of Caviar and Velvet overload, I decided to go with a couple of accent nails on each hand, along with some black & white glitter polish from Models Prefer (which I will review in a coming post).

Eager to try these out, and not knowing how long the process would take, I decided to apply them prior to going to bed.  Given that this probably wasn't the brightest idea, I then decided that I would take some photos the next day to see how they held up.

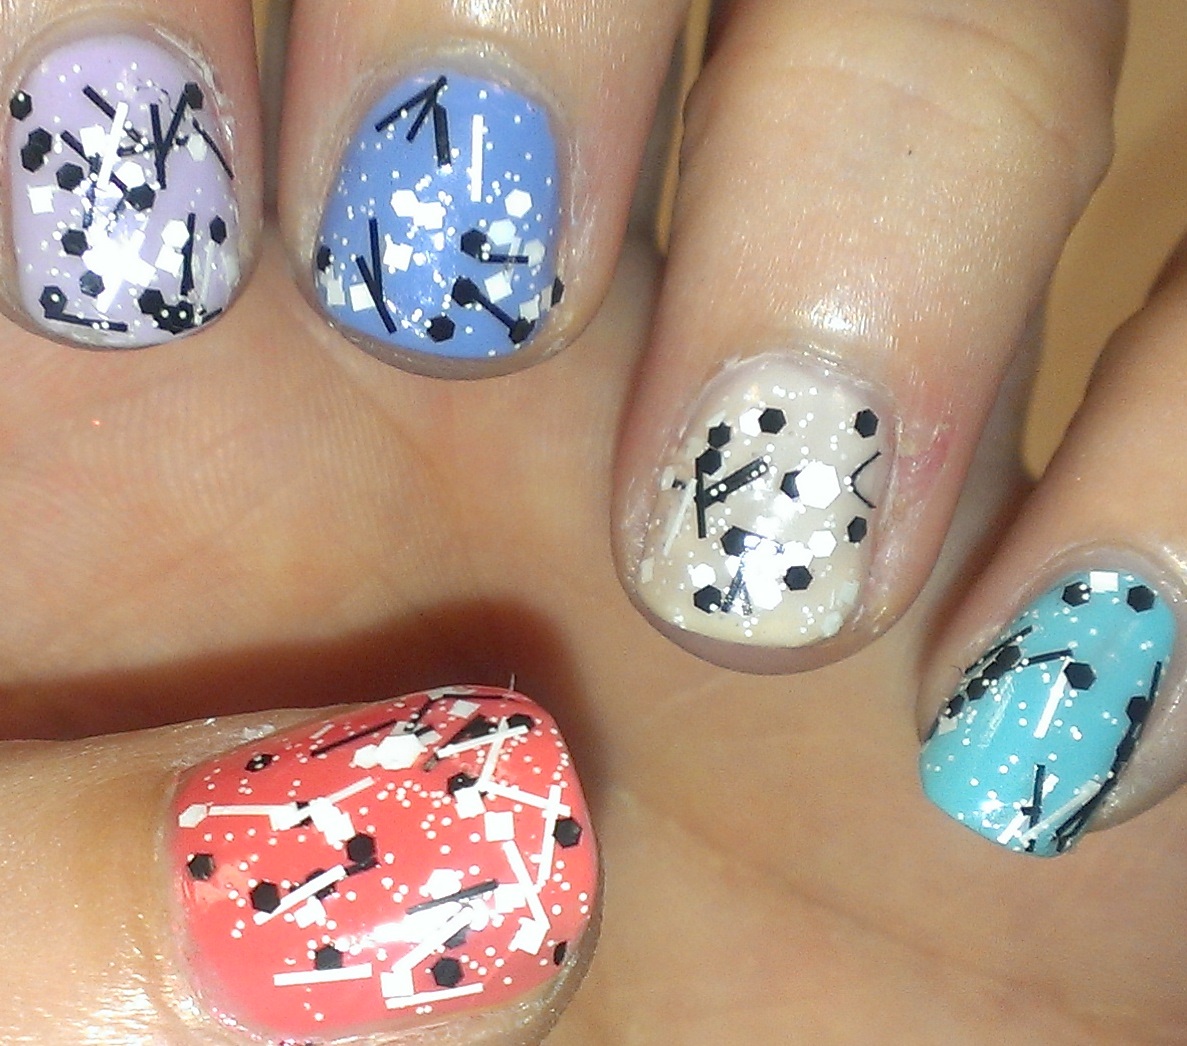
Photo no. 1:  Just applied


Aren't they just beautiful!  The Velvet (Bow Peep's Sheep) was super easy to apply.  By comparison, the Caviar (Jane Bond), was similarly straightforward to apply, but I can't help thinking there is an art to it to get better bead coverage.  You will also need to remove some of the beads around the edges so that the effect doesn't look so clunky, however, you'll need to wait until everything is dry.

Photo no. 2:  In the morning


As you can see, the Velvet endured a night between sheets, a shower, make-up application and travelling to work. 

The Caviar, however, didn't come off as lightly.  Where beads have fallen off, it has taken polish with them, leaving gaps and naked nail.  I can assure you that it doesn't look as bad from a distance, and you can get away with it by just painting the base colour over top of where you've lost beads.

The lesson learned here is to do your caviar just before going out so as to keep the effect fresh and beads still attached.  You will lose beads as you go along, so make sure you either put them back in the little pottle that comes with the kit or dispose of them immediately so little children/animals don't accidentally consume them.

Photo no. 3:  At the end of the (working) day


In my job, I am using my hands all day, so I wasn't surprised that I lost so many beads.  To be honest, I had actually started removing some beads prior to taking this shot, then remembered I needed an "after" photo, so this looks worse than what it actually was.  Most of the beads that remained in the morning stayed on for the rest of the day, so I think the tip here is to make sure when you apply the base colour of nail polish (for the beads to stick to), make sure you add extra so that it gives the beads a chance to properly adhere to the nail.

Regarding the Velvet, you can see it is a little more worse for wear, but actually not too bad considering I was touching it all day (it felt so nice and furry!).  Similar to the caviar/beads, you must ensure that your base coat of polish is thick to allow maximum adhering to the nail for optimum results.

I haven't yet decided if I will go all out and try each on my entire set of digits - I think they look nicer as accent nails, but if I do, I will be sure to post the results.

The sets are available at Gloss Cosmetics and Kmart for $7.95 each.

NN

New gems from Savvy

As mentioned in my earlier post, Glitter City, Savvy has recently released some new polishes from their $3 range sold at Priceline (see all the shades here).  And here are two more I acquired . . .

Savvy - U.F.O.


U.F.O. is a blurple with a slight pink shimmer running through it, which, once it dries to a near matte finish, you can only see ever so slightly.  Yes folks, another case of a colour in a bottle not translating to the nail. Still, a lovely colour!


Savvy - Galaxy


Galaxy is another Chanel - Peridot dupe wannabe.  That said, it has its slight differences - a grittier finish compared with Peridot and a very slight scattering of pink glitter-like flecks throughout.

I tried to find a few more of the shades that seemed interesting, but it seems that they'd already been snaffled up, so that's all for now.  Watch this space.

Congratulations Savvy on your new cost-friendly options!

NN

Sunday, June 9, 2013

A couple of randoms


I've been admiring Sinful Colors - Bali Mist for a while, so decided to bite the bullet and get it.

Bali Mist:


Bali Mist is very similar to Let Me Go, also a Sinful Colors polish, in that it's very sheer and pearly.  The flash on the above photo makes this look a lot more pink and solid than it actually is.  It's a very subtle shade, and one that I would call work appropriate.  I might combine this with Let Me Go and see how it works out.  Stay tuned.

The second random polish I have is 129 Essence's The Boy Next Door.  Now, I have the version which is without the glitter particles, but on Essence's website and on it's panels in Priceline stores, it shows that it has glitter in it. Not that any of the Priceline stores in the city seem to be stocking 129 (the slots for it are all empty), but I digress . . .

The Boy Next Door:


I like this polish because it's blue, but I do think it would look better with the glitter in it.  Nothing else to report really, as the formula and brush are the same as the usual Essence standard.  A good value nail polish!

NN

Insta-Dri

I've come on board pretty late in regards to Sally Hansen's Insta-Dri range, so late in fact, that they seem to be phasing this range out.  Where there were once stands of this range in Priceline stores, recently these seem to have made way for the new Lustre Shine range of products.

There are a few bottles still floating around, though.  I managed to pick up a couple of bottles from a Gloss Cosmetics store in the city for cheap in the shades Blazing Blue and Chartreuse Chase.

Blazing Blue:


Chartreuse Chase:


What a shame that this range has been discontinued!  These polishes are GREAT!  Great colours, smooth formula, fairly quick to dry (not instant, but fairly quick) and a fabulous-shaped, easy to use brush. I also don't usually comment on bottle shapes (because they don't normally fuss me), but I really like the rounded triangular shape of these bottles.  They feel easier to hold.

Needless to say, I'm going to see if I can scrounge up a few more different shades of these beauties!

NN

Glitter City


Continuing on with my glitter polish obsession, here are a couple of Savvy polishes I found on a discount shelf in Priceline, that I hadn't seen before.

Glam & Chiq (no flash):


Glam & Chiq (flash):


Glam & Chiq is an almost sapphire coloured glitter polish, with a translucent blue base, scattered with various shades of blue glitter, along with a dispersing of a lighter, almost violet glitter. It's very gritty, so if you choose to pop a top coat on, it would require a few coats, however, I chose to wear mine without, as grit doesn't bother me too much. I also chose to wear it on its own without a base colour - I think doing this enables you to see the different types and sizes of glitter contained in the polish.

I can report that they managed to stay in tact during my day in the office without any chipping. Although, removing the glitter at the end of the day was another story.

Rock & Roll (with flash):


Rock & Roll (no flash):


Rock & Roll is a glitter polish with almost holographic properties.  Set in a black translucent base, there are several sizes of gold glitter which catch the light and sparkle in a rainbow of colours.

I chose to wear this using Sally Hanson's Complete Salon Manicure in Midnight in NY to give greater contrast to the gold glitter, and boy, did it give contrast.  I would say that it's the most "blingy" polish that I own.  I love it!

I also decided to try it over various shades of green/turquoise (see below), and while it didn't work over the lighter shades (due to the black translucent base), it didn't look too bad against the darker ones (Jordana - Boy oh Boy and China Glaze - Turned up Turquoise).


Turned up Turquoise & Rock & Roll:
 

Boy oh Boy & Rock & Roll:


NN

Sunday, June 2, 2013

Got the blues

I've been reacquainting myself with the Farscape Sci-Fi TV series recently, and got a burst of inspiration for some "Zhaan" nail art.

Using MUD - Blue Moon, I painted a bright blue base:


Next, using Essence - Absolutely Blue, I painted a lighter blue middle over top:


Next, I used a gold nail art pen to make the gold flecks Zhaan has on her face.  Unfortunately, I should have waited a little longer for the polish to dry, but I am impatient and so I smooshed it a little.  All finished and just for a bit of fun!

 
And lastly, a little bit of stamping - Face of Australia's Ocean Villa with Sinful Colors - Snow Me White stamped over top.


NN

Stickers, and all that glitters

Howdy everyone! I'm back with a stack of pics for you.
First up, Nail Rock nail stickers. I purchased mine from Priceline (you can see the range they stock here).  I was really excited to try these, as I had been trying to find a robin's egg type polish or sticker for my nails for ages.  I'd previously had a fairly positive experience with the 1000 hour 3D Nail Wraps, so I thought these would be awesomesauce.  They.  were.   not.
 
 
As you can see from the photos above and below, they were a disaster from start to finish.  There were sufficient application instructions, however, I think the product itself was lacking.  There were lots of different-sized stickers to fit different nail sizes, and yet I couldn't seem to find exactly the right size to fit my nails.  The instructions also suggested that you could cut down the stickers to fit as required.  My problem with that is you won't know whether you need to cut the sticker until you get it on or near your nail, and by that stage, you've taken it off its backing.  Given that you're not meant to touch the back surface of the sticker (which adheres to your nail), cutting it to fit makes it extremely difficult.
 
At this point, I will say that they adhered to my nails extremely well.  So well, it took me ages (30 minutes) to remove them.  This is a problem when you need to remove part of the sticker to fix an inevitable crease that will occur as a part of application.
 
Verdict:  Don't waste your money.  They're not worth it.


Polish time!  Face of Australia recently released a limited edition range called Glitterati.  Take a look at my favourites below:
 
 
Glitterati:  Funky Town
 
Funky Town was probably the least effective out of the three that I purchased.  The distribution of glitter throughout the polish was quite sparse, and while I liked the bluey/purple/periwinkle colour, the polish itself was very sheer, and yet it covered up the glitter so you couldn't really see it.


Glitterati:  Heart of Glass

The formula for Heart of Glass was a bit tacky, and took a while to dry, but I adore its large square glitters.  Glitter ratio throughout was much better than Funky Town, and because of the pale base polish colour, you're better able to see the glitter pieces.


Glitterati:  Boogie Wonderland
 
Boogie Wonderland is my favourite out of the three, purely for ease of application.  I think the polish formula is just right for this one, and while it'll need at least three coats to get opaque coverage, you can get away with just one if you want something a little more understated.
 
Warning:  More glitter ahead! 
 
Missha recently released their The Style Lucid Nail Polish [Dazzling] range, which are basically a bunch of topcoat glitter polishes.
 
Dazzling No. 6:


Dazzling No. 6, is a black and white hex, square and bar glitter polish (gasps!).  It works really well against pastels, and application is awesomesauce.  This is my favourite, and I'm happy that these companies seem to be getting better at their glitter polish formulas.

Dazzling No. 1:


Dazzling No. 1 is a blue and red hex/square/bar polish.  Please excuse the rubbish photo (with tip wear, no less!).  Similar to No. 1, application was easy and the glitter is nicely dispersed.  I'm keen to try this one with a purple base to bring out the red, or maybe even a black.

Dazzling No. 5:


The trouble with Dazzling No. 5 is that there is too much bar glitter.  Bar glitter is difficult to apply at the best of times, but this formula is a little gluggy and that just doesn't make it any easier.  I might put a bit of thinner in this bottle to see whether that makes any difference.  Will also try it with a different base colour next time - I don't think the teal does it any favours.

Dazzling No. 8:


Dazzling No. 8 is basically a flakie topcoat, so, technically it's not a glitter (but close enough).  The above photo doesn't really show how chunky the flakies are, and if you don't want to feel them on your nails, you'll need quite a bit of topcoat to cover them up.  The formula is basically the same as No. 5, so I'll also try this one with a bit of thinner in it and see how it goes.

NN